The Field
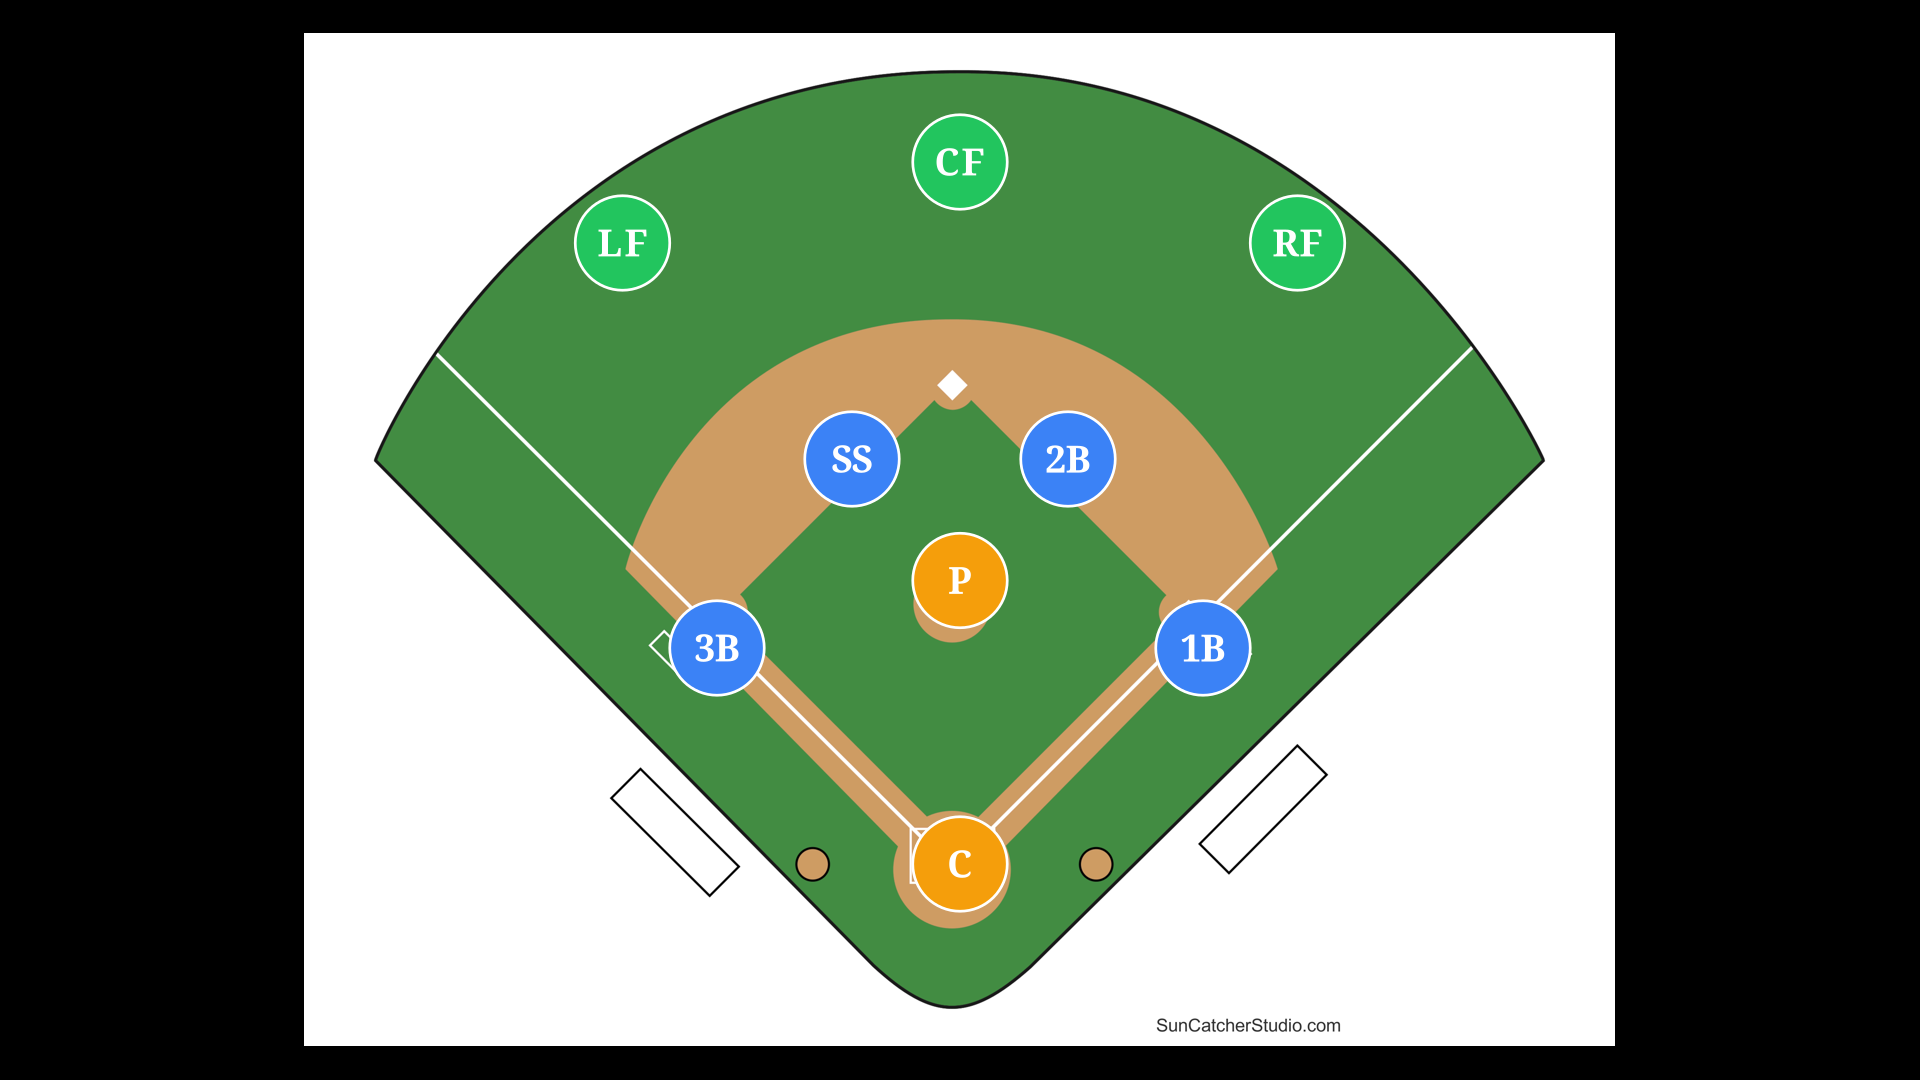
Position markers show where each player typically stands at the start of a play.
Position Abbreviations
Every position has a number (used in scorekeeping) and an abbreviation. Here's the quick reference:
| # | Abbr | Position | Area |
|---|---|---|---|
| 1 | P | Pitcher | Battery |
| 2 | C | Catcher | Battery |
| 3 | 1B | First Base | Infield |
| 4 | 2B | Second Base | Infield |
| 5 | 3B | Third Base | Infield |
| 6 | SS | Shortstop | Infield |
| 7 | LF | Left Field | Outfield |
| 8 | CF | Center Field | Outfield |
| 9 | RF | Right Field | Outfield |
Where to Stand (and Why)
As a beginner, knowing where to stand is just as important as knowing what to do. Your positioning changes based on the game situation, but here are the defaults.
Infielders: Stay Behind the Base Paths
The rule: Stand a few steps behind the imaginary line connecting the bases (the "base path").
Why: This gives you time to react to ground balls. If you're too close, hard-hit balls will get past you before you can move. Standing back also keeps you out of the runner's way.
- 1B/3B: About 3-5 steps off the bag, a few steps behind the base line
- 2B/SS: Split the gap between bases, deep enough to have range both ways
Outfielders: Deeper Than You Think
The rule: Start deep (near the warning track for experienced players, or about 20-30 steps behind the infield dirt for beginners).
Why: It's easier to run in on a ball than to run back. A ball hit over your head is almost always a disaster. A ball hit in front of you? You can charge it and still make the play.
- CF: Deepest position, covers the most ground
- LF/RF: Angle toward the foul line slightly, ready to cut off balls in the gap
Adjusting for the Situation
Your starting position changes based on:
- Batter tendency: Pull hitter? Shift toward their power side
- Count: Two strikes? Move in slightly (expect contact)
- Runners on base: May need to cover a bag or cut off a throw
- Outs: With 2 outs, outfielders play deeper (no need to hold runners)
Beginner tip: When in doubt, stay at your default depth. Coaches will tell you when to adjust.
Position Breakdown
Pitcher (P)
Location: Center of the diamond on the pitcher's rubber
Primary job: Deliver pitches to the catcher, field bunts and grounders hit back to the mound
Key skill: Accuracy, composure under pressure
Catcher (C)
Location: Behind home plate in the catcher's box
Primary job: Receive pitches, call the game, throw out base stealers, field bunts
Key skill: Quick release, game awareness, communication
First Base (1B)
Location: Near first base bag
Primary job: Catch throws from infielders, field grounders on the right side
Key skill: Stretching for throws, scooping low balls
Second Base (2B)
Location: Between first and second base
Primary job: Field grounders, turn double plays, cover second on steals
Key skill: Quick hands, pivot footwork
Third Base (3B)
Location: Near third base bag
Primary job: Field hard-hit balls, bunts down the line, make long throws to first
Key skill: Quick reflexes, strong arm
Shortstop (SS)
Location: Between second and third base
Primary job: Field grounders, cover second, relay throws from outfield
Key skill: Range, arm strength, leadership
Left Field (LF)
Location: Outfield, left side
Primary job: Catch fly balls, back up third base and shortstop
Key skill: Reading the ball off the bat, accurate throws
Center Field (CF)
Location: Outfield, center
Primary job: Cover the most ground, call off other outfielders, back up second
Key skill: Speed, communication, judgment
Right Field (RF)
Location: Outfield, right side
Primary job: Catch fly balls, make throws to third and home
Key skill: Strong arm (longest throw to third)